Interview Recording App for Mac How to Record and Transcribe
You've just finished an interview on your Mac. The conversation was useful, the source was candid, and you stayed focused instead of typing notes. Then you open the transcript and find missing words, incorrect names, no reliable speaker labels, and sections you can't confidently verify. The recording exists, but the usable interview doesn't.
A practical interview recording app has to solve more than capture. It needs to preserve intelligible audio, produce searchable text, identify speakers, handle cleanup, and give you control over where sensitive material goes. On macOS, that means treating the workflow as one chain, microphone setup, recording, transcription, verification, storage, and export.
The privacy decision sits inside that chain. Cloud processing can provide convenient cleanup and formatting, while local processing keeps raw audio on the Mac. AIDictation provides a useful macOS-native example because it supports Auto Mode, Local Mode for on-device recognition, and Cloud Mode for connected cleanup. The right choice depends on the interview, not on a generic feature list.
Table of Contents
- Why Interview Recording on Mac Still Goes Wrong
- How to Choose the Right Interview Recording App on macOS
- Hardware and macOS Setup for Clear Interview Audio
- Recording and Transcribing Interviews Step by Step on Mac
- Privacy Cleanup and Export Without Losing Accuracy
- Your Interview Recording Checklist and Next Steps
Why Interview Recording on Mac Still Goes Wrong
The most common failure starts before the app opens. A journalist records an in-person conversation with the Mac's built-in microphone placed near one speaker, while a fan, keyboard, café noise, and room reflections compete with the voices. The transcript may look polished at first glance, but names, short answers, and overlapping speech are exactly where errors hide.
The same problem appears in remote interviews. System audio may be routed through one device while the recording app listens to another input. A Bluetooth headset can introduce its own connection or microphone limitations. If one participant speaks softly and another interrupts, an app can't reconstruct words that never reached the recording clearly.
The record button is only one part of the workflow
A serious interview recording app must handle four separate jobs:
- Capture: Record a clean, stable audio signal from the right microphone.
- Transcription: Convert speech into searchable text without losing the conversation's structure.
- Cleanup: Correct punctuation, remove unnecessary filler, and preserve meaning rather than making unsupported edits.
- Control: Keep confidential audio local when required, or make the cloud trade-off explicit when convenience matters more.
Accuracy varies sharply in real interview conditions. Leading systems can reach 99% accuracy, while average platforms may fall to 61.92% with background noise and multiple speakers, according to interview transcription performance data from Sonix. That gap explains why a transcript that looks acceptable in a quick skim can still be unsafe for publication, research coding, or clinical documentation.
Practical rule: Treat the transcript as a searchable draft until you've checked names, numbers, quotations, and moments where speakers overlap.
Speaker identification deserves special attention. Research summarized in a qualitative transcription study found that omitted speaker identifiers represented 54% of transcriptionist errors, while missing dialogue caused by inaudible audio represented 37% of errors. The same source reports that accuracy checking can take about 1.5 to 3.5 hours, depending on transcript quality and interview length. Better capture reduces that burden, but no app removes the need for judgment.
Privacy changes the definition of convenience
Cloud transcription is convenient because remote servers can provide advanced cleanup, formatting, translation, and synthesis. It also means sensitive audio leaves the device. For investigative journalism, participant research, healthcare conversations, or unpublished product interviews, that may conflict with your consent terms or organizational policy.
Local processing creates a different trade-off. You may give up some cloud conveniences, but raw audio can remain on the Mac, where you can manage storage and access directly. The practical question isn't whether local or cloud processing is universally better. It's whether the workflow gives you the usability you need without violating the interview's confidentiality requirements.
How to Choose the Right Interview Recording App on macOS
Start with the audio path, not the marketing language. An app that advertises transcription in many languages still needs to perform well with your microphone, room, speakers, accents, interruptions, names, and technical vocabulary. Recent product coverage describes interview transcription across 58+ to 80+ languages, with features such as translation, speaker labeling, and AI cleanup, but language count alone doesn't tell you how an app handles code-switching or an unfamiliar surname. The multilingual academic interview transcription overview from Notta is useful context, but you should test your own recordings.
Must-have criteria for real interviews
Speaker labeling matters more than decorative summaries. If the app can't distinguish interviewer and subject, you'll spend time reconstructing who said what. Ask every participant to introduce themselves at the beginning and spell names aloud when accuracy matters.
Offline versus cloud processing is the central privacy choice. A local mode should make clear whether recognition happens on the Mac and whether audio is sent anywhere. A cloud mode can be appropriate for low-risk material or when advanced cleanup is worth the transfer, but it shouldn't be the default for confidential reporting.
Export control determines whether the transcript can move into your actual workflow. Look for editable text and practical document exports rather than a transcript trapped inside an app. You may need a verbatim record, clean paragraphs, a quote list, or a version prepared for a research coding tool.
Custom vocabulary is valuable for company names, medical terms, product names, and specialist language. Context rules can also help an app format dictation differently for an email, a research memo, or an editor.
AIDictation is one macOS example to evaluate. Its Auto Mode selects between available engines, Local Mode uses Parakeet v3 on Apple Silicon for on-device recognition, and Cloud Mode provides connected cleanup such as formatting, filler-word removal, and handling of self-corrections. Those modes represent a meaningful usability and privacy trade-off rather than a claim that one setting suits every interview.
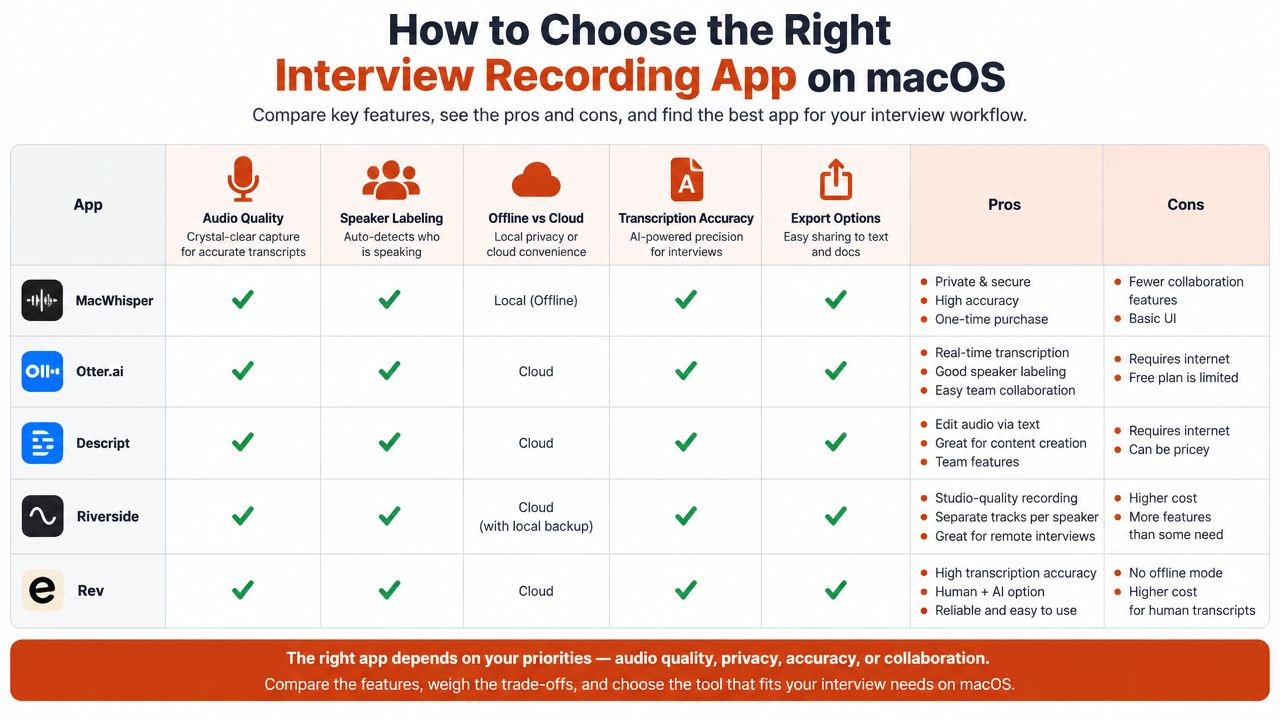
Interview Recording App Feature Decision Matrix
| Feature | Journalism | Research | Healthcare |
|---|---|---|---|
| Audio quality | Essential for quotable passages and playback | Essential for coding and verification | Essential for clinical clarity |
| Speaker labeling | Must-have | Must-have for interview analysis | Must-have for documentation |
| Offline processing | Strong preference for confidential sources | Often required for sensitive participants | Evaluate against institutional policy |
| Cleanup and formatting | Useful after verification | Useful for organizing themes | Useful, but edits need careful review |
| Export options | Editable text and secure document sharing | Searchable text for analysis | Controlled, auditable document handling |
For a broader macOS voice-to-text comparison, see this guide to voice-to-text apps for Mac. Use a short test recording before committing. Make the test resemble work, including two speakers, a proper noun, an interruption, and the room where you'll record.
Hardware and macOS Setup for Clear Interview Audio
Transcription quality starts with microphone placement. For a one-person remote interview, a headset or close USB microphone usually beats the Mac's built-in microphone because it keeps the voice nearer to the capsule and reduces room sound. For an in-person conversation, place a suitable microphone between speakers only if it captures both voices evenly. Otherwise, use separate microphones or record closer to the person whose words matter most.
Keep the microphone stable and avoid touching the desk. A laptop fan, HVAC system, keyboard, coffee grinder, and reflective hard surfaces can all become transcript problems later. Soft furnishings help, but distance and direction usually matter more than expensive accessories.
A five-minute Mac sound check
- Open System Settings, then Sound, and confirm the intended input device. Don't assume macOS has selected the microphone you used last time.
- Speak at your normal interview volume while watching the input level. Avoid whispering during the test, because a level that works for a quiet test may fail when the speaker turns away.
- Put on headphones and listen for hum, echo, keyboard noise, or an unstable Bluetooth connection.
- Record a short sample with both speakers talking naturally. Include an interruption and a name that the transcript must get right.
- Play the sample back before you begin. If the audio is distorted or one voice is much quieter, fix the room or microphone position now.
A practical guide to choosing a microphone for speech can help if you're comparing built-in, headset, USB, and external microphone options. The best microphone is the one you can place consistently and monitor reliably.
Prevent the errors you can't edit later
Ask participants to speak one at a time when possible, and have everyone state their name at the start. Mute notification sounds, close noisy apps, and keep the Mac connected to power for a long session. For remote calls, wear headphones so the interview audio doesn't spill back into the microphone.
Don't rely on aggressive noise removal to rescue bad placement. Cleanup can reduce distractions, but it can't reliably restore a consonant buried under a cough or a sentence lost beneath overlapping speech.
Recording and Transcribing Interviews Step by Step on Mac
Use the simplest workflow that preserves the interview's privacy and the transcript's usefulness. Before recording, tell participants what you're doing and obtain the consent required for your situation. A recording can involve legal and ethical obligations that vary by location and by the participants' locations, so follow your organization's policy and get advice when the circumstances are unclear.
Open the recording function in your chosen app, select the correct microphone, and run the short sound check described above. With AIDictation as the working example, Local Mode is appropriate when you need private, on-device recognition without an internet connection. Cloud Mode is useful when you've decided that connected processing is acceptable and want AI cleanup, formatting, or filler-word handling. Auto Mode can choose between the available engines when you don't want to make that decision manually.
Capture first, interpret later
Start the meeting recording only after the consent and microphone checks are complete. Keep the Mac positioned so the microphone has a clear path to both speakers, and avoid moving it once the interview begins. If you're recording a remote interview, check that the app is receiving the actual call audio rather than only your local microphone.
Have each person identify themselves. This gives the transcription engine useful context and gives you a reference point when speaker labels drift. It also helps during manual review, especially when participants have similar voices or interrupt each other.
Watch for the conditions that produce weak text:
- Accents and language changes: Record a representative sample before the full interview and test important names or terms.
- Mumbling: Ask for a repeat immediately rather than hoping the transcript will infer the words.
- Technical vocabulary: Add recurring names and specialist terms to the custom dictionary when the app supports one.
- Self-corrections: Preserve the original meaning during the first pass. Decide later whether a polished quote should retain or remove the correction.
- Overlapping speech: Mark the moment for review instead of assigning uncertain words to the wrong speaker.
For a more detailed capture-to-text workflow, use this guide on how to transcribe interviews.
After stopping, save the original recording before editing the transcript. The recording is your audit trail. A cleaned paragraph may be easier to read, but it shouldn't replace the source file when you're checking a quote, resolving a disputed detail, or documenting how a conclusion was reached.
Use the transcript as a searchable index into the audio. Search for names, dates, organizations, and key phrases, then listen to the surrounding passage. This is faster and safer than reading every line with equal attention, particularly when the interview contains long narrative answers.
The workflow is similar for in-person and remote interviews, but remote recordings need an extra routing check. Confirm that system audio and microphone input are both captured when the app supports that configuration, and make a short test call before the conversation.
Privacy Cleanup and Export Without Losing Accuracy
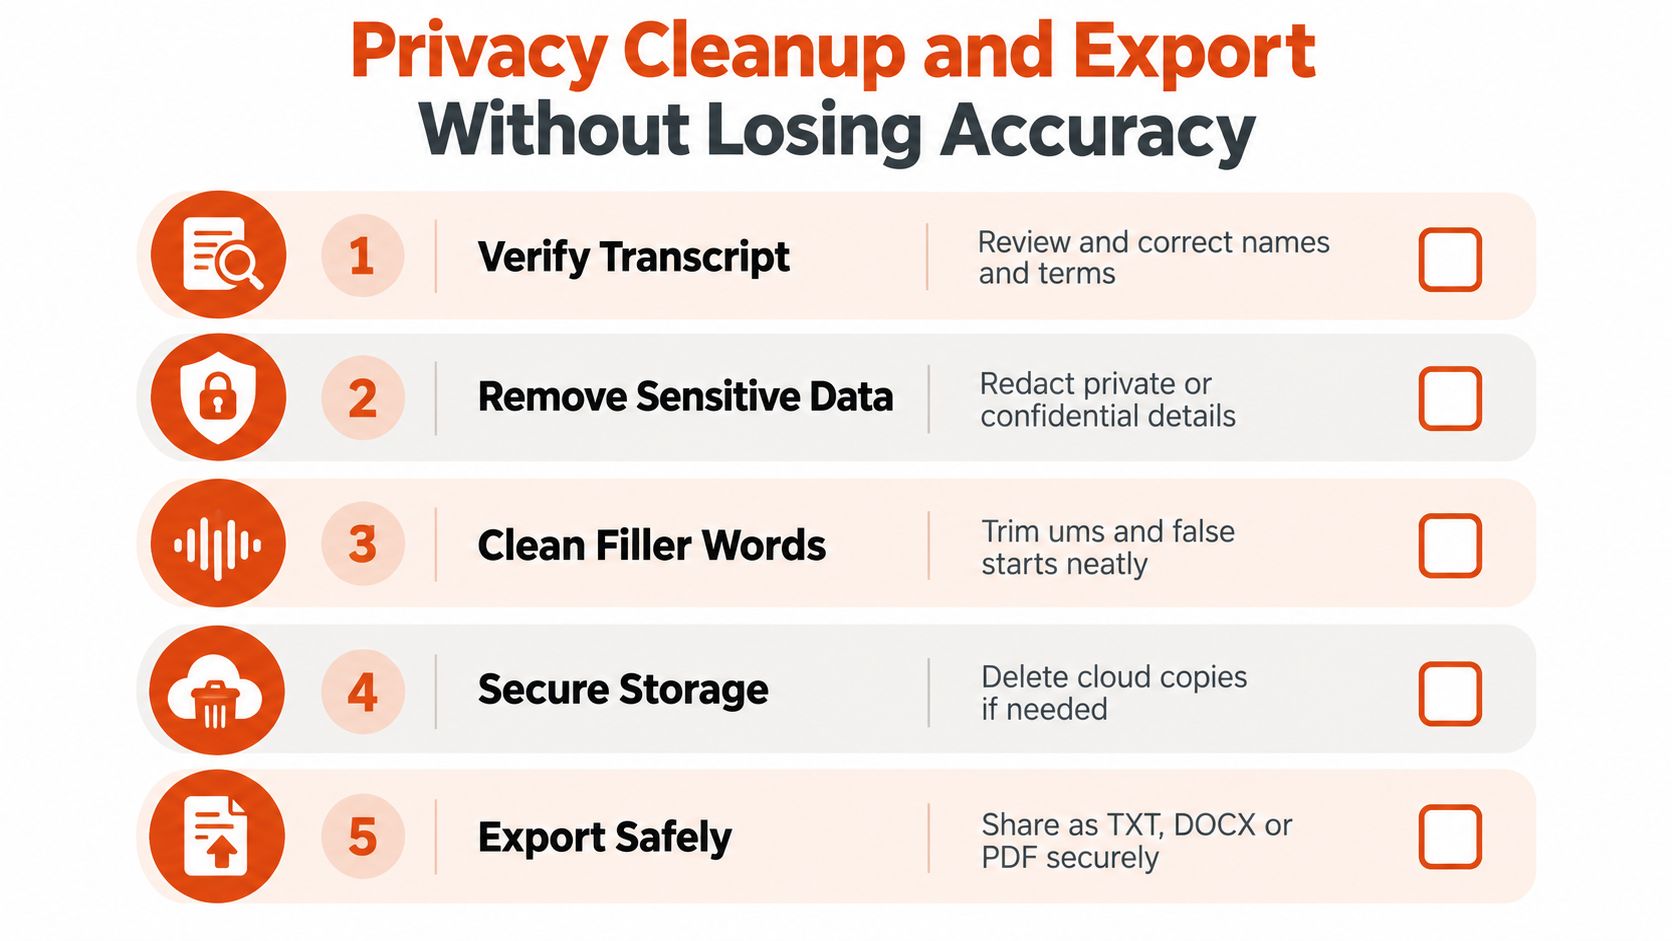
Stopping the recording begins the editorial phase. First preserve the original audio and raw transcript, then create a working copy for correction. That separation lets you clean the document without losing the evidence needed to verify a quote or revisit an ambiguous exchange.
For confidential work, choose local storage where possible, protect the Mac with device encryption and a strong login, and avoid cloud upload when the interview terms prohibit it. Local processing addresses one part of the risk, but it doesn't make the material automatically safe. Someone with access to the Mac, an unprotected export, or a synced folder may still be able to read it.
A defensible transcript review
Work through the transcript in passes rather than trying to perfect everything at once.
- Verify names and terms: Compare proper nouns, organizations, product names, medical language, and technical vocabulary with the audio.
- Check speaker labels: Confirm who made each significant statement, especially after interruptions.
- Review numbers and commitments: Listen again to dates, prices, measurements, deadlines, and promises.
- Remove filler carefully: Delete repetitive “ums” or false starts only when doing so preserves the speaker's meaning and agreed quotation style.
- Redact sensitive details: Remove personal information that the recipient doesn't need before exporting or sharing.
Cloud cleanup can save editing effort when the content is suitable for that trade-off. It can produce cleaner paragraphs and handle punctuation more smoothly, but it may also make uncertain text look confident. I prefer to run cleanup before final fact-checking, then compare every material edit against the original audio.
Multilingual interviews need a similar discipline. Don't judge quality by the language list alone. Check names, code-switching, accents, interruptions, and domain terms in a sample that reflects the conversation. If the output is translated into English, retain the original transcript or audio so the translation remains traceable.
Export with the audience in mind
Create different outputs for different jobs. A journalist may need a searchable transcript plus a quote document. A researcher may need speaker labels and timestamps for coding. A team may only need a concise, edited summary, while a healthcare workflow may require stricter access and retention controls.
Before sending a PDF outside your organization, remove unnecessary identifying information and inspect the document properties. If metadata could expose the author, source filename, or editing history, use PDFKing to strip metadata before sharing. This doesn't replace secure storage or consent, but it closes a privacy gap that many export workflows overlook.
Delete cloud copies when your policy requires it, and document where the final transcript lives. Don't keep duplicate audio files in Downloads, a shared desktop folder, and an automatically synced directory without a reason. A clear retention routine protects both the interviewee and the person responsible for the files.
Your Interview Recording Checklist and Next Steps
A dependable Mac interview workflow is deliberately boring. You choose the app based on privacy and export needs, place the microphone close enough to capture real speech, test the complete audio path, and verify the transcript before treating it as evidence.
Use this pre-flight list before the next interview:
- Confirm consent: Tell participants about recording and transcription before the conversation begins.
- Choose the processing mode: Use local processing for material that shouldn't leave the Mac. Use cloud cleanup only when the risk and policy allow it.
- Select the input: Confirm the microphone in macOS Sound settings and in the app.
- Control the room: Silence notifications, reduce fans and echo, and keep the microphone stable.
- Run a sample: Record both speakers, an interruption, and important terminology.
- Identify speakers: Ask participants to introduce themselves clearly.
During the interview, stay engaged. A transcript supports attention, but it doesn't replace follow-up questions or editorial judgment. Ask speakers to repeat anything that matters when the audio is unclear, and make a quick note when a quote, name, or number needs checking.
Afterward, preserve the original recording, correct speaker labels, verify important passages against the audio, remove only the filler that fits your editorial purpose, and export the smallest useful version for each recipient. Keep sensitive material local when required, and review document metadata before external sharing.
AIDictation's free tier lets you test the workflow without an account, while Pro options add access to unlimited cloud and local models, translation to English, and audio or video transcription. Try the process on a low-risk interview first, then decide whether its local and cloud options fit the privacy rules of your reporting, research, or documentation work.
AIDictation gives Mac users a practical way to record interviews, create editable transcripts, and choose between on-device recognition and connected cleanup. Visit AIDictation to test a privacy-conscious interview workflow before your next conversation.
Frequently Asked Questions
What does Interview Recording App for Mac How to Record and Transcribe cover?
You've just finished an interview on your Mac. The conversation was useful, the source was candid, and you stayed focused instead of typing notes.
Who should read Interview Recording App for Mac How to Record and Transcribe?
Interview Recording App for Mac How to Record and Transcribe is most useful for readers who want clear, practical guidance and a faster path to the main takeaways without guessing what matters most.
What are the main takeaways from Interview Recording App for Mac How to Record and Transcribe?
Key topics include Table of Contents, Why Interview Recording on Mac Still Goes Wrong, The record button is only one part of the workflow.
Ready to try AI Dictation?
Experience fast voice-to-text on your device. Free to download.
Download FreeRelated Posts
Transcription Audio to Text: A Practical Workflow Guide
Learn transcription audio to text with a clean workflow covering tools, recording, cleanup, and accuracy tips that work on macOS and beyond.
Voice to Text on Mac: Built-in Dictation vs the Best Apps (2026)
How to use voice to text on a Mac or MacBook: turn on built-in dictation, see where it falls short, and compare the best Mac voice to text apps for 2026.
Voice Typer for Mac Guide to Smarter Dictation
Explore voice typer for Mac options, compare built-in and AI tools, improve accuracy and privacy, and choose the right dictation workflow.